ThinPrint Printing from Mac in Less than 10 Minutes
Hey ThinPrint Fans,
Has the CEO or someone with a VIT (very important title) purchased a MAC and now it is your task to set it up with ThinPrint so that they can print to their local printer? Not to mention, they need this to work ASAP. Your first thought is OMG, I will have to work OT to figure this out…
Don’t worry! Below you will find the exact steps on how to setup up ThinPrint Engine to print from MAC in less than 10mins! Just follow these simple steps and voila! They will be printing in minutes.
I. Ask yourself, “Which ThinPrint Client for MAC do I download and install”?
This is simple, ThinPrint has 3 clients for MAC available:
- Client MAC for ICA – Install this when starting sessions via Citrix
(Citrix Receiver is required to be installed on the MAC) - Client MAC for RDP/JUMP – Use this when starting sessions via RDP
(JUMP RDP Client App is required to be installed on the MAC) - Client MAC for TCP – Use this when the MAC and Application Server are in the same network.
(NOTE: if the MAC is on a NAT network, Thinprint Connection Service product is required to be installed)
Now that you know which one you need, go here and download it: www.thinprint.com/clients-tools
ThinPrint Connection Service info is available here…
II. Install the ThinPrint Client on the MAC.
Just accept all defaults on the installer.
III. Go to the Application Server that has the ThinPrint Engine installed:
Open Thinprint Configuration Manager ->Port Manager and create a new ThinPrint port:
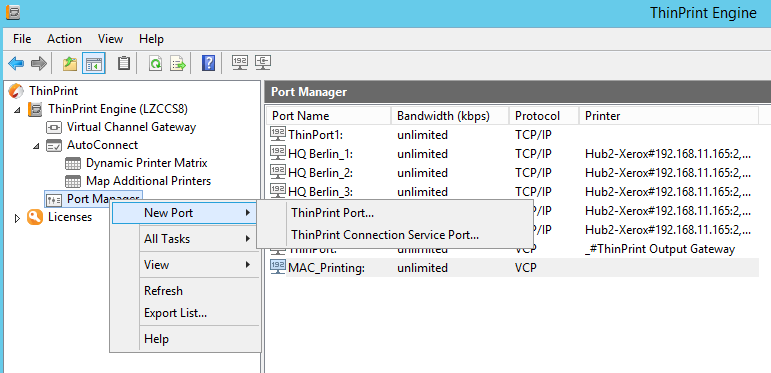
NOTE: In this example, I named the ThinPrint port “MAC_Printing”
Open the properties of the port you just created above and select the correct Protocol, ICA RDP or TCP/IP (selection depends on which Thinprint Client you installed on step I.
Open Thinprint Configuration -> Autoconnect->Dynamic Printer Matrix and add a target as below:

- Check box x = refers to Mac clients (and other non-windows operating systems)
- Check box I, R, T = refers to the connection protocol (ICA, RDP, and TCP/IP)
- Target Field: TPPS!MAC_Printing:
- TPPS = refers to the PostScript driver TP Output Gateway PS
- ! = separator
- MAC_Printing: refers to the name of the ThinPrint Port you created in step III.
Apply and close the Autoconnect table.
IV. Now start the session from the MAC to the application server.
The virtual printer will show up as “printername#username:id”. e.g below is ICA/RDP session.
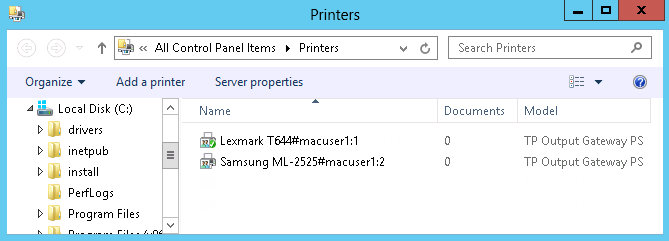
You are done! Now the user can start printing with ThinPrint from MAC.
Have a happy printing day!
Laura Zagal